Sort by Category
- February 2024
- January 2024
- December 2023
- November 2023
- October 2023
- September 2023
- August 2023
- July 2023
- March 2023
- February 2023
- January 2023
- December 2022
- November 2022
- October 2022
- September 2022
- August 2022
- June 2022
- May 2022
- April 2022
- March 2022
- February 2022
- January 2022
- December 2021
- November 2021
- October 2021
- September 2021
- August 2021
- July 2021
- June 2021
- May 2021
- April 2021
- March 2021
- February 2021
- January 2021
- December 2020
- November 2020
- October 2020
- September 2020
- August 2020
- July 2020
- June 2020
- May 2020
- April 2020
- March 2020
- February 2020
- January 2020
- December 2019
- November 2019
- October 2019
- September 2019
- August 2019
- July 2019
- June 2019
- May 2019
- April 2019
- March 2019
- February 2019
- January 2019
- December 2018
- November 2018
- October 2018
- September 2018
- August 2018
- July 2018
- June 2018
- May 2018
- April 2018
- March 2018
- February 2018

Strawberry Cheesecake Protein Balls
HERE’S WHY WE LOVE THEM:
An adequate amount of protein per serving
No baking required, easy to prepare
Minimal ingredients needed
A healthy Valentine's Day snack or dessert
Ideal as a pre/post workout snack
Craving a sweet treat that won't sabotage your healthy lifestyle? Try these Strawberry Cheesecake Protein Balls – they're a hit with gym goers and perfect for satisfying your sweet tooth.

HERE’S WHY WE LOVE THEM:
An adequate amount of protein per serving
No baking required, easy to prepare
Minimal ingredients needed
A healthy Valentine's Day snack or dessert
Ideal as a pre/post workout snack


WHAT MAKES THEM SO PROTEIN-PACKED?
This recipe uses nut butter and protein powder as its primary protein sources. We recommend using the vanilla flavor from Equip Foods – it provides the perfect balance of sweetness and nutrition. If you're interested in trying this protein powder, use the code ROOTS at checkout to receive 15% off. Don't forget to subscribe to our newsletter for more exclusive promo codes from this brand!


If you try this recipe, let us know! Leave a comment, rate it, and don’t forget to tag a photo to #fromtherootsblog on Instagram. We love seeing what you come up with!
Craving a sweet treat that won't sabotage your healthy lifestyle? Try these Strawberry Cheesecake Protein Balls – they're a hit with gym goers and perfect for satisfying your sweet tooth.
Servings: 36-38 balls Prep: 5 MIN Cook time: 0 MIN
Ingredients
3 cups gluten-free oats (or oat flour)
1 cup vanilla protein powder
2 Tbsp ground cinnamon
½ tsp pink Himalayan sea salt
1 cup pure maple syrup
1 ½ cup nut butter
½ cup coconut oil (half melted)
1 tsp vanilla extract
¼ - ½ cup white chocolate chips
1/4-1/2 cup freeze dried strawberries
Instructions
In a food processor, blend oats until flour consistency and then add the rest of the ingredients to process minus the chocolate chips. Fold in the white chocolate chips and use a 1 tbsp measuring spoon or cookie scooper to turn into balls!
Notes
Although it's not necessary, melting the coconut oil can improve the dough's texture and the distribution of the white chocolate chips throughout the balls, creating a delightful cheesecake flavor.

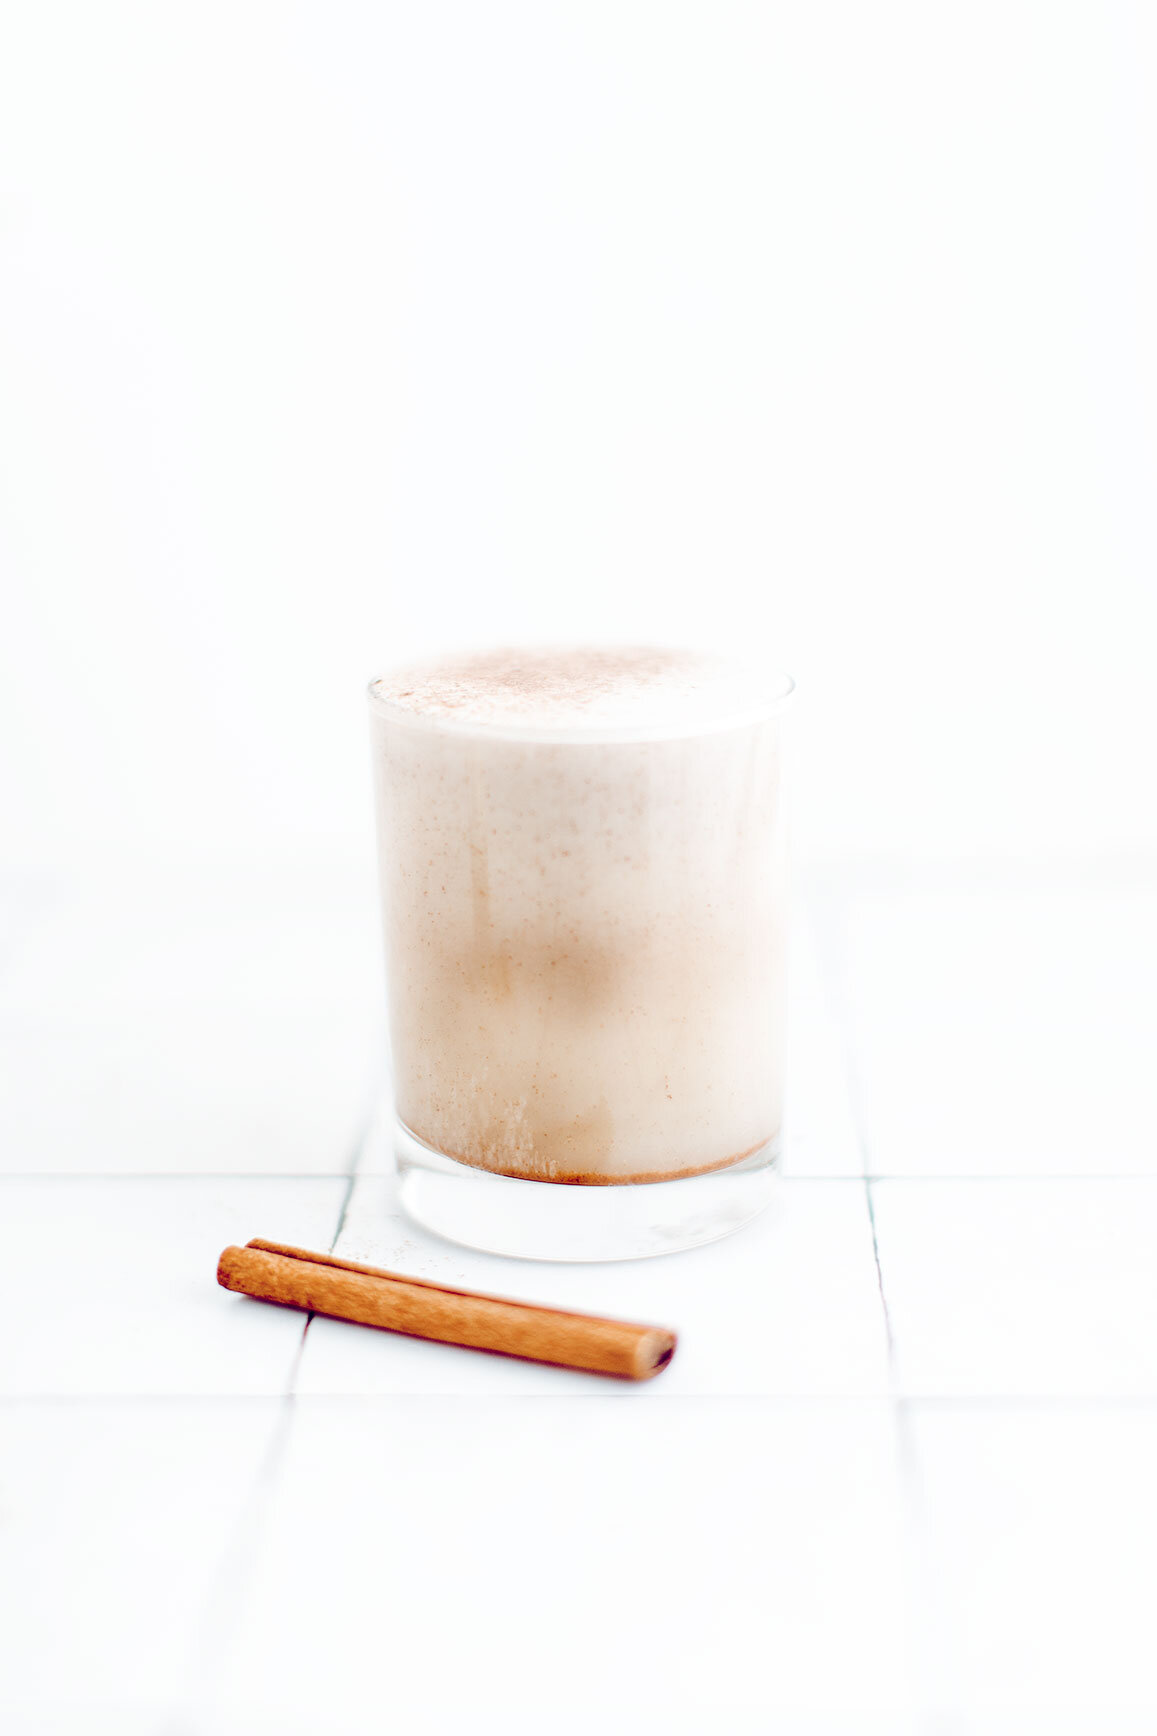
Coconut Milk Panna Cotta
When I was in Italy, panna cotta was one of my favorite desserts! And fortunately enough, my body was able to tolerate the luxurious mixture of whole milk and heavy cream. But when ordering panna cotta from an Italian restaurant in the states, it definitely hits me (and my gut!) differently. Lol
So that is why I have created a healthy spin on the traditional panna cotta, using full fat canned coconut milk. Not only is this dessert dairy free, but it’s also free of refined sugar using pure maple syrup as the sweetener.
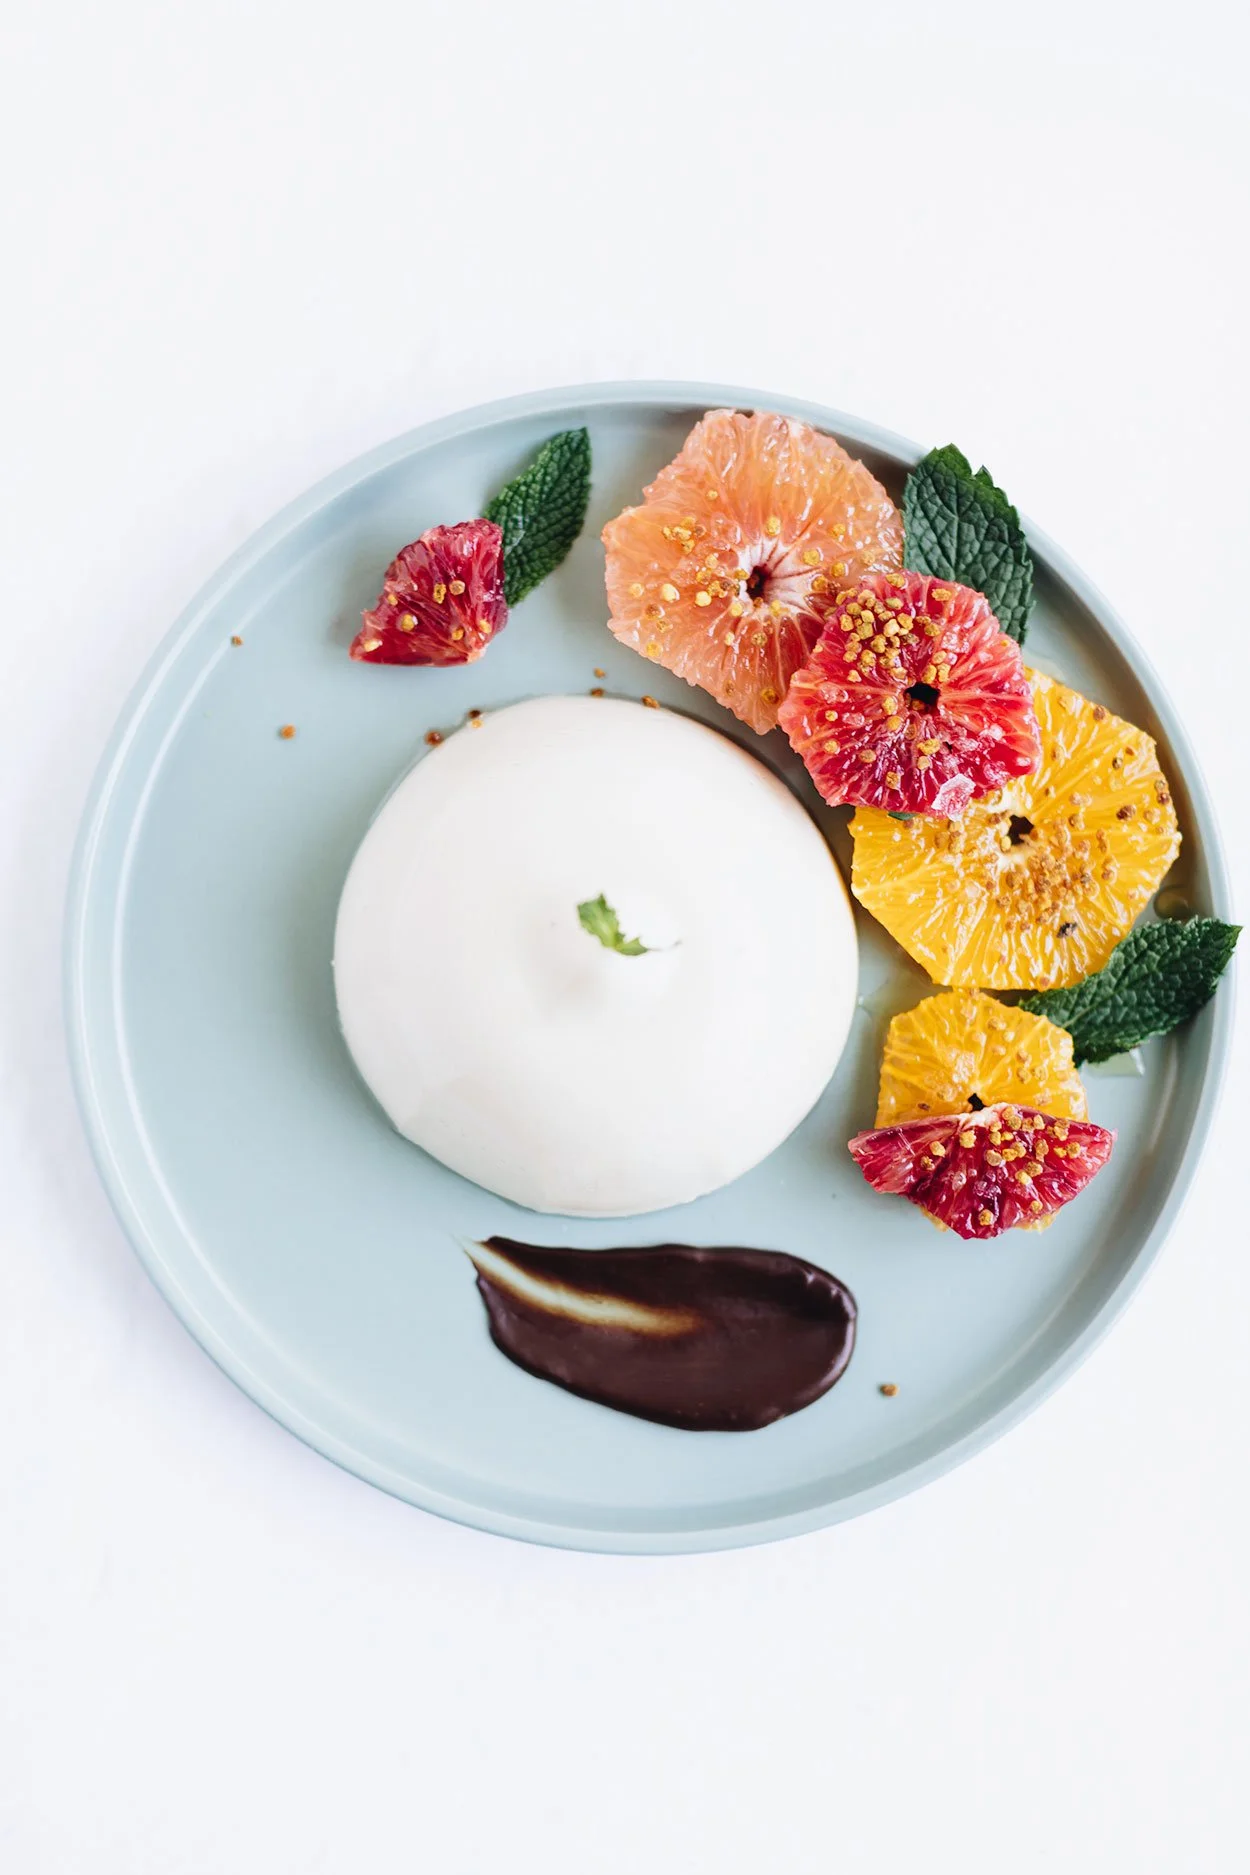
Coconut Milk Panna Cotta - A healthy spin on a classic Italian dessert that’s dairy-free, refined sugar-free and gluten-free. Accompanied by your choosing of honey citrus compote, strawberry sauce and dark chocolate sauce!
When I was in Italy, panna cotta was one of my favorite desserts! And fortunately enough, my body was able to tolerate the luxurious mixture of whole milk and heavy cream. But when ordering panna cotta from an Italian restaurant in the states, it definitely hits me (and my gut!) differently. Lol
So that is why I have created a healthy spin on the traditional panna cotta, using full fat canned coconut milk. Not only is this dessert dairy free, but it’s also free of refined sugar using pure maple syrup as the sweetener.

Travel nostalgia birthed this recipe but also the idea of using bovine gelatin. Recently, I have switched over to using Perfect Supplements as my main supplement source - taking desiccated liver capsules as my “multi-vitamin” and switching over to their hydrolyzed collagen powder. And now, I have been wanting to experiment using their bovine gelatin.
To give you the lowdown on this form of gelatin:
Made with 100% beef gelatin (collagen protein)
Sourced exclusively from brazilian pasture raised (grass fed) cows
The only gelatin to receive perfectly pure certification
And is great for recipes that call for gelatin or a gelling or thickening agent. (i.e. soups, fruit gelatin, gummy treats, custards, marshmallows and more!)
If you want to try it for yourself, here is CANDACE10 for 10% off your first order!
Now, back to Panna Cotta!


A couple tips when making this dish:
Make sure to not boil the coconut milk or the gelatin will lose its setting power
The consistency of panna cotta should have a soft jiggly texture.
Panna cotta can be made ahead of time (up to 2 days) and stored in the fridge.
You can easily double the recipe when making for a crowd or dinner party!
Instead of vanilla extract, you could use ½ vanilla bean.
If you try this recipe, let us know! Leave a comment, rate it, and don’t forget to tag a photo to #fromtherootsblog on Instagram. We love seeing what you come up with!
Coconut Milk Panna Cotta - A healthy spin on a classic Italian dessert that’s dairy-free, refined sugar-free and gluten-free. Accompanied by your choosing of honey citrus compote, strawberry sauce and dark chocolate sauce!
4 servings | Cook time 10 min | Prep Time 20 min
Ingredients
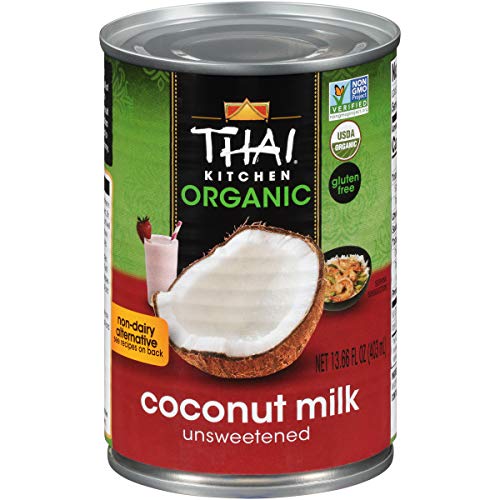
1 can full fat unsweetened coconut milk
⅓ cup pure maple syrup
1 scoop or ¼ oz gelatin
1 tsp vanilla extract
Strawberry sauce
2 cups fresh or frozen strawberries, hulled and sliced
3 Tbsp water
1 Tbsp organic sugar or pure maple syrup
Juice of half lemon
Honey citrus compote
1-3 citrus fruits (grapefruit, orange, blood orange)
Honey
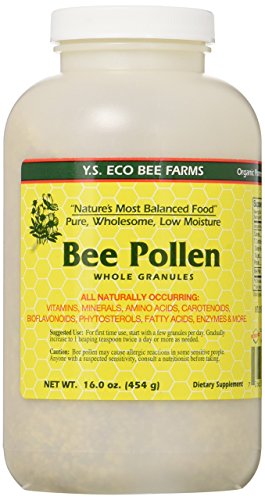
Bee pollen
Fresh mint leaves
Directions
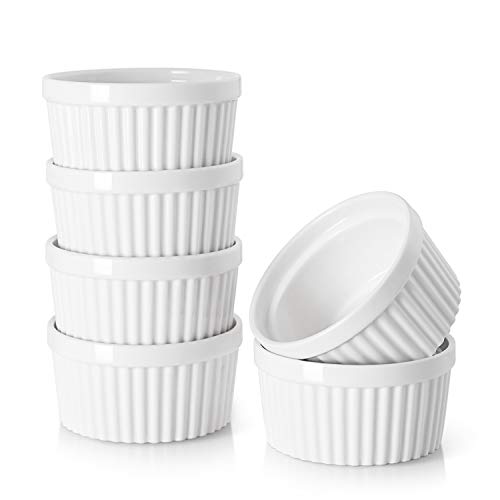
Grease 4 small dishes (ie ramekins, bowls, pudding dishes) to pour the panna cotta into.
In a small saucepan, whisk together half of the coconut milk and gelatin until combined. Set aside for about 5-10 min at room temperature to let the gelatin bloom.
Place the saucepan over medium heat and add vanilla. Whisk thoroughly until gelatin dissolves. Continue to heat until steam rises (but do not bring to a boil). Turn off the heat.
Remove from heat and whisk in maple syrup and remaining coconut milk. Pour the mixture equally into each dish, let sit at room temperature before placing them in the fridge for 2-3 hours.
While the panna cotta is setting, prepare sauce mixture or citrus salad, or both!
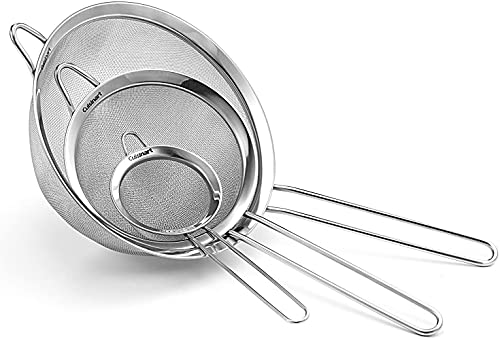
For the strawberry sauce: add sliced strawberries, lemon juice, honey and water to a medium pot. Cook for 7-12 minutes and remove from heat. Blend using an immersion blender, food processor or blender. Strain the sauce into a sieve (to remove strawberry seeds) and transfer sauce to a bowl or jar until ready to use.
For the citrus salad: slice the citrus fruits, and remove any pith. Cut in smaller pieces if desired. Add a drizzle of honey, bee pollen and mint!
To serve, you can either serve them directly in the dish or unmold them onto a plate. Top with strawberry sauce, citrus salad, or chocolate sauce and enjoy!
SHOP OUR FAVORITE TOOLS + INGREDIENTS FOR THIS RECIPE!

Red Velvet Cinnamon Rolls
Is your love language, baking?! Then here’s your opportunity to bake a delicious, gooey, flaky pan of red velvet cinnamon rolls for your significant other, best friend, or for yourself! The person you are baking for is gluten and/or dairy intolerant/allergic? That’s okay, I have provided swaps!
If you are short on time but still love to make homemade delicious treats, then I have provided a way to make them overnight. That way, you can throw them in the oven first thing in the morning, go back to your snuggle sesh, and be woken up by the delicious aroma of cinnamon rolls!
Red Velvet Cinnamon Rolls - Naturally beet dyed red velvet cinnamon rolls, are the ultimate addition to your slow mornings. Made from scratch, these rolls are delicious, gooey, and flaky with a sweet and thick cream cheese frosting. I have provided ways to make these gluten-free, dairy-free, and instructions on how to make them overnight.

Is your love language, baking?! Then here’s your opportunity to bake a delicious, gooey, flaky pan of red velvet cinnamon rolls for your significant other, best friend, or for yourself! The person you are baking for is gluten and/or dairy intolerant/allergic? That’s okay, I have provided swaps!

If you are short on time but still love to make homemade delicious treats, then I have provided a way to make them overnight. That way, you can throw them in the oven first thing in the morning, go back to your snuggle sesh, and be woken up by the delicious aroma of cinnamon rolls!


I’ve partnered with Eggland’s Best Eggs to make these cinnamon rolls. What I like about them is that Eggland’s Best Eggs are available nationwide. That way, if you don’t have access to get eggs from a local farmer, you can go to any grocery store and still benefit from getting good quality organic cage free eggs!


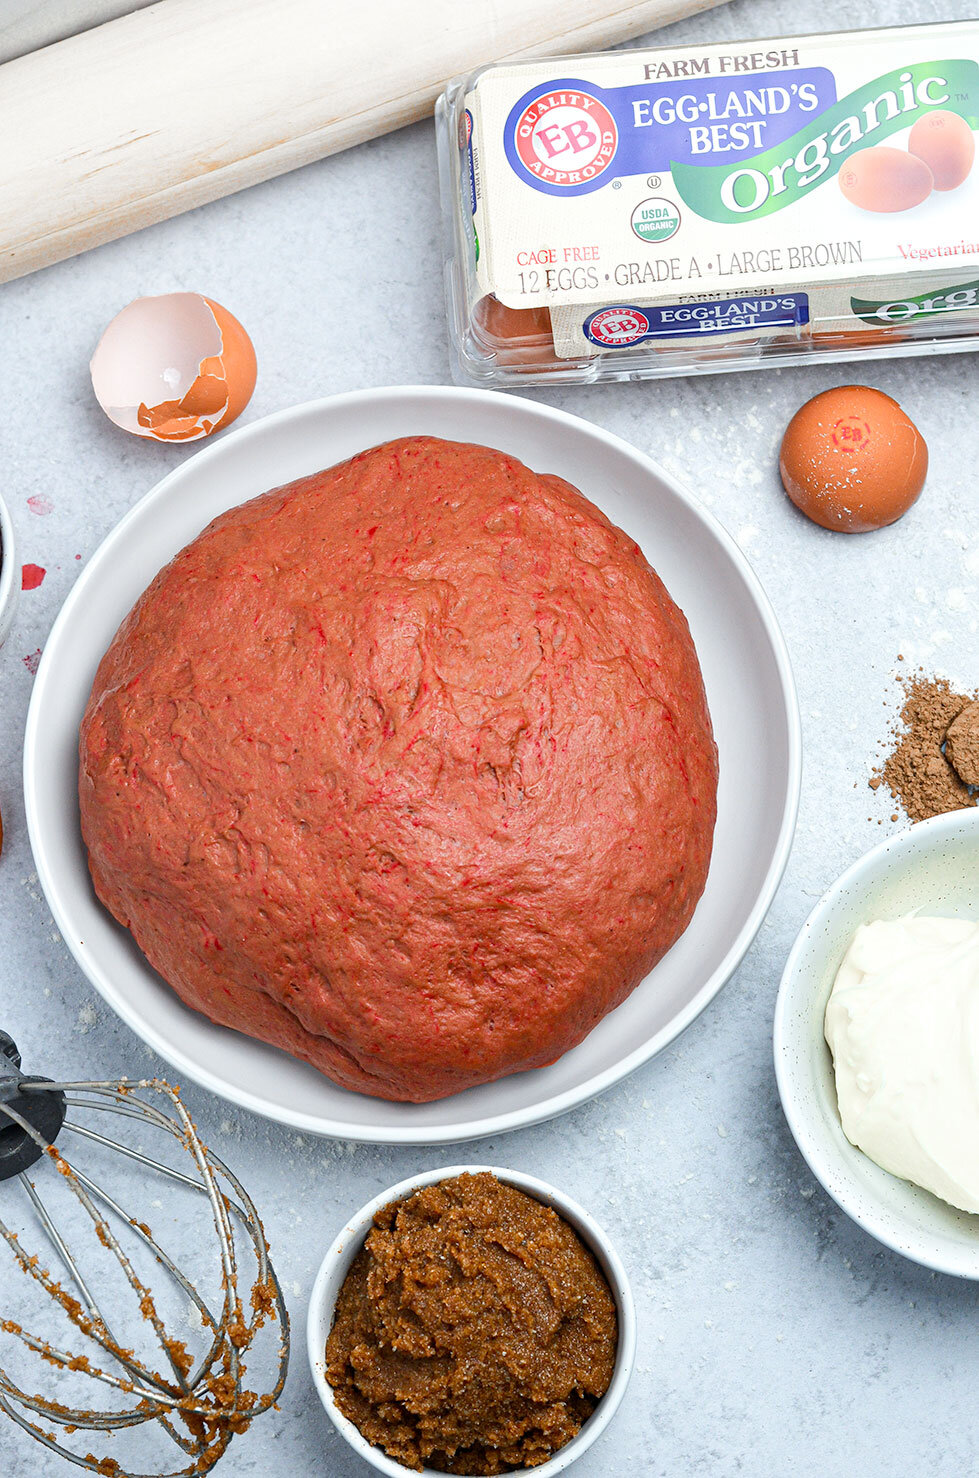
In order to make these red velvet, you will need chocolate like cocoa powder, vinegar, and red food coloring. Now you can use red food coloring but I wanted to turn these slightly pink since Valentine’s Day is coming up, so I used beetroot juice. I seem to always have it on hand whether I’m boiling beets to make my pickled beets or purchase Love Beets to make my beet hummus. If you decide to use the powder form, make sure you are reserving ¼ cup flour out of the normal recipe as the powder absorbs the liquid mixture causing the cinnamon rolls to be dry.

If you try this recipe, let us know! Leave a comment, rate it, and don’t forget to tag a photo to #fromtherootsblog on Instagram. We love seeing what you come up with!
Red Velvet Cinnamon Rolls - Naturally beet dyed red velvet cinnamon rolls, are the ultimate addition to your slow mornings. Made from scratch, these rolls are delicious, gooey, and flaky with a sweet and thick cream cheese frosting. I have provided ways to make these gluten-free, dairy-free, and instructions on how to make them overnight.
Ingredients
3 cups bread flour
*gluten free version in notes
1 packet (2-1/4tsp) rapid rise yeast
¾ cup warm plant-based milk (110 degrees F)
¼ cup unsalted grass-fed butter (melted & cooled) + 1 Tbsp melted butter
¼ cup organic cane sugar
3 Tbsp cocoa powder
2 Tbsp beet juice or 10-20 drops of natural red food coloring
1 tsp apple cider vinegar
1 tsp baking powder
¼ tsp salt
2 Eggland's Best organic eggs (whisked and room temperature)
Filling
¼ cup softened unsalted butter
¾ cup organic brown sugar
1 Tbsp ground cinnamon
Cream Cheese Frosting:
4-6 oz softened cream cheese or lactose-free cream cheese
¾ cup organic powdered sugar
½ tsp vanilla extract
Directions
Warm milk in a small saucepan until the temperature reaches 110 degrees F. It should feel like warm bath water. Transfer warm milk to the bowl of an electric mixture. Add sugar and sprinkle yeast on top. Let sit for 30 minutes. Add in whisked eggs, vinegar, melted and cooled butter and red food dye of choice. Mix until well combined.
In a medium bowl, combine flour, salt, baking powder, and cocoa powder. Place dough hook on the stand mixer and slowly add flour mixture to the liquid mixer on medium speed for about 4-8 minutes. Dough should form into a nice ball and be slightly sticky. If it’s too sticky (sticking to your hands or to the bottom of the mixer) add in 2 Tbsp increments of flour.
Transfer dough ball to a well-oiled bowl, cover with plastic wrap and a warm towel. Allow dough to rise for up to an hour, or until doubled in size (if doing the gluten-free version, the dough will rise only slightly). To make sure your dough is proofing nicely, you can set the bowl in the oven under the “bread proofing” option and turn the oven off once it hits 100 degrees or you can wrap your bowl around Christmas lights (that’s what I do!)
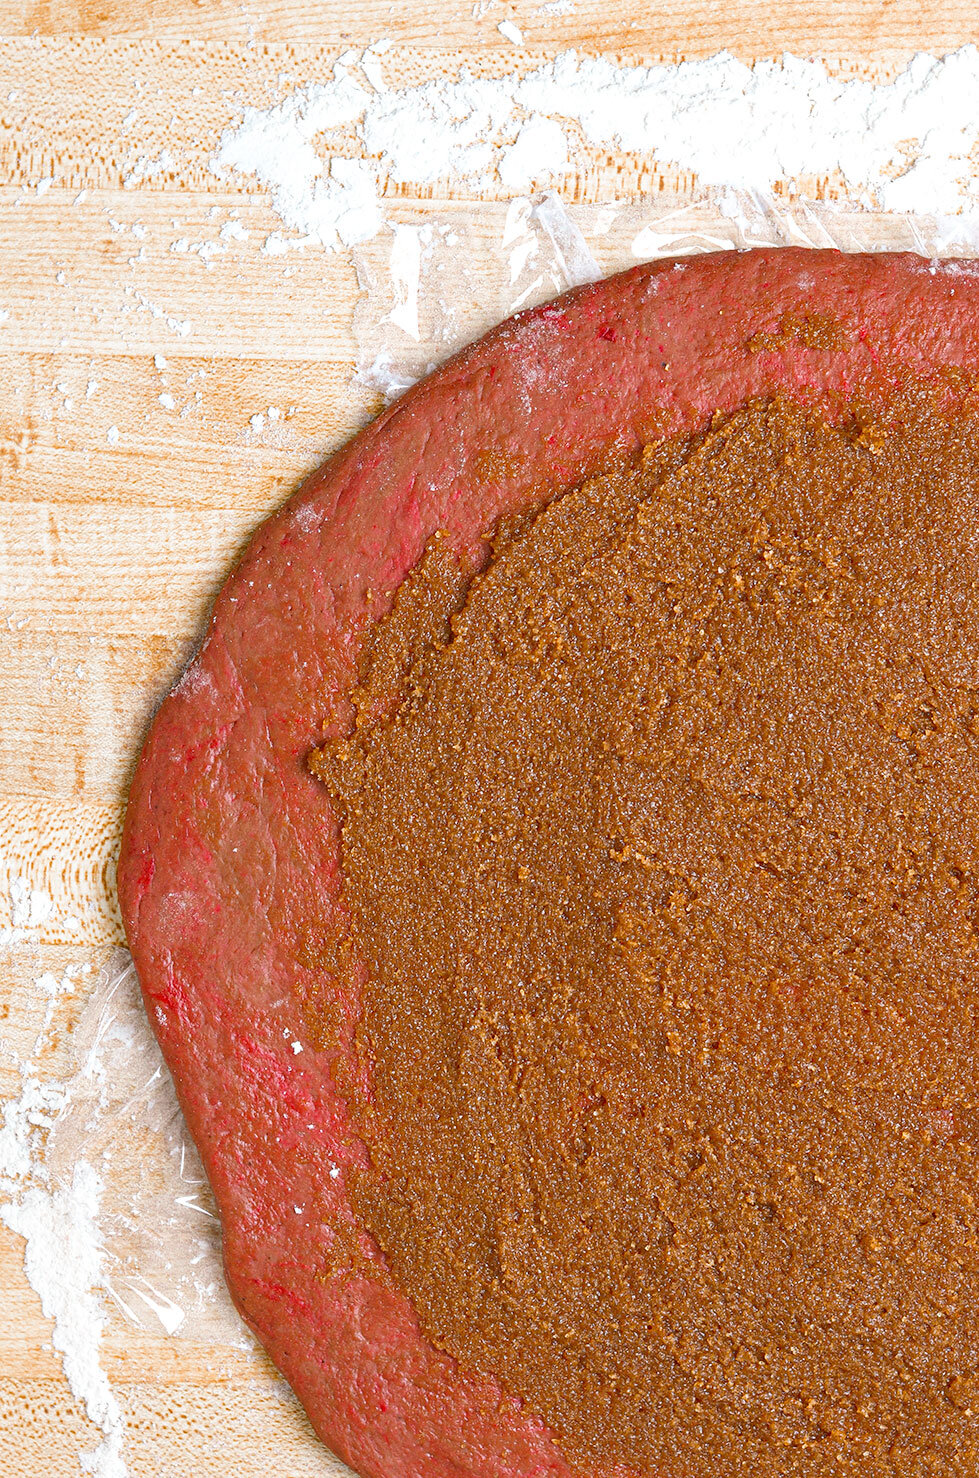
While your dough is rising, make the filling by adding softened butter, cinnamon, and brown sugar to your electric mixture or small bowl. Mix until well combined. Set cinnamon filling aside and wash out the mixer to make the frosting!
In the bowl of the electric mixer, combine softened cream cheese, powdered sugar and vanilla extract. Beat until smooth and fluffy. Set aside or leave in the mixture until you are ready to spread over cinnamon rolls.
At this point, your dough has doubled in size! Get a large cutting board or large surface and sprinkle flour over the surface and place plastic wrap over it (about 14x9 inch rectangle). Add the dough in the center of the plastic wrap and sprinkle with more flour. Then top with another sheet of plastic wrap. Roll dough out into a 14x9 inch rectangle. Remove the top layer of plastic wrap and spread cinnamon filling over dough; leaving about ¼ inch margin at the far side of the dough. Tightly roll the dough lengthwise into a cylinder. (The bottom layer of plastic wrap helps to get that tight roll!) I like to carefully “smash” both ends together to make a fuller roll!
Use a serrated knife or dental floss to cut into even 9 rolls. You may want to cut about an inch off both ends of the dough since the ends will not be full of the cinnamon filling.
Place cinnamon rolls in a greased 9x9 baking pan or round 9 inch cake pan. For easier clean up, line the pan with parchment paper. Melt the tablespoon of butter and brush the tops of the rolls with melted butter. Cover with a warm towel and let rise again for 30-45 minutes.
Preheat the oven to 350 degrees. Remove the towel and bake cinnamon rolls for 20-25 minutes or until just slightly golden brown on the edges. I say slightly so the center stays gooey! Allow them to cool 5-10 minutes before frosting.
Notes
To make these gluten-free: replace bread flour with gluten-free 1 to 1 baking flour and add an additional tsp of baking powder to the dry mix. The rolls will not rise as much as the original recipe but will still taste just as good, if not better, in my opinion!
I use these brands for the lactose-free version cream cheese: Green Valley Creamy Lactose Free *my favorite and Miyoko’s Vegan Cream Cheese *Still good but more “vinegar” tasting
To make these overnight: After placing rolls into the greased pan (after the first rise), simply cover the pan with tinfoil and place in the fridge overnight. When you are ready to bake them, set the pan on the counter for at least 30-45 minutes (room temperature) before baking (this is their second rise).
If you decide to use beetroot powder instead of beet juice, decrease your flour mixture by ¼ cup and gradually add more flour if the mixture seems to be too sticky when making the dough.

Rosemary & Red Wine-Braised Short Ribs
‘Tis the season for comfort food, chaotic schedules, and holiday parties. What better dish to appease all three things than a staple braised short rib recipe, amiright?! That’s why I created a dish that requires one pot, very few ingredients (and most you will have on hand), and high-quality meat that is cooked in less time than most short rib recipes.
In my opinion, braising short ribs is the way to go if you want to develop the best flavor!
Rosemary & Red Wine-Braised Short Ribs - These tender wine-braised short ribs will soon be your go-to for healthy comfort food. Ribs braised in a dutch oven and served over brown butter sage mashed sweet potatoes - can’t beat it!

‘Tis the season for comfort food, chaotic schedules, and holiday parties. What better dish to appease all three things than a staple braised short rib recipe, amiright?! That’s why I created a dish that requires one pot, very few ingredients (and most you will have on hand), and high-quality meat that is cooked in less time than most short rib recipes.


In my opinion, braising short ribs is the way to go if you want to develop the best flavor!
The Art of Braising
SALT - Salt your meat generously on all four sides and let sit overnight or salt at least 30 min to 3 hours in the fridge. The longer the better!
BROWN - Heat a cast-iron skillet on medium-high heat using quality oil. Sear meat on all four sides until you get a nice browning. More space between meat gets it brown(er).
BUILD - Layer ingredients in the pan. I.e. use deglazing liquid from browned meat plus water/stock, add the meat back in, aromatics, and herbs.

I paired these short ribs with my favorite brown butter sage mashed sweet potatoes but you can use any side dish you like!


If you try this recipe, let us know! Leave a comment, rate it, and don’t forget to tag a photo to #fromtherootsblog on Instagram. We love seeing what you come up with!
Rosemary & Red Wine-Braised Short Ribs - These tender wine-braised short ribs will soon be your go-to for healthy comfort food. Ribs braised in a dutch oven and served over brown butter sage mashed sweet potatoes - can’t beat it!
Ingredients
3.5 lbs bone-in short ribs (use 3 lbs if using boneless beef short ribs)
1 can (28 oz) fire-roasted diced tomatoes
1 large white onion (sliced)
4 cloves garlic (minced)
2 cups organic low-sodium beef broth
2 cups red wine (cabernet sauvignon)
2 Tbsp Extra Virgin Olive Oil
1 Tbsp balsamic vinegar
1 Tbsp low-sodium Worcestershire sauce
1 Tbsp light brown sugar
4-6 fresh rosemary sprigs
S&P to season to taste
Directions
Generously season your meat on all four sides with salt and pepper and let sit overnight or for at least 30 minutes to 3 hours in the fridge. The longer the better.
Heat oil in dutch oven or cast-iron skillet over medium-high heat.
Add short ribs to hot oil and sear for 3-4 minutes per side until browned. Try not to move the short ribs once you put them down and make sure they have space between the meat.
Remove the short ribs from dutch oven/skillet and set aside. They won't be fully cooked yet, and that’s okay!
Return dutch oven to stovetop and lower temperature to medium heat. Add sliced onions and minced garlic. If the pan looks too dry, add another splash of olive oil. Saute until onion is translucent, about 2-3 minutes.
Add the broth and wine to deglaze the dutch oven. Make sure to scrape down any browned bits off the bottom of the pan with a wooden spoon.
Add the rest of the ingredients (tomatoes, balsamic vinegar, sauce, brown sugar, rosemary sprigs, and S&P) along with the short ribs and mix until combined. Once the mixture is boiling, bring the heat down to low medium and cover the dutch oven with a tight-fitting lid.
Cook on stovetop for 2 hours - 2 hours and 30 minutes or until short ribs easily pull apart with tongs/ fork or the meat is falling off the bone.
Serve short ribs with reserved leftover broth over mashed potatoes or over brown butter sage mashed sweet potatoes.
Garnish with fresh rosemary and pomegranate arils for a festive look!
Notes
No dutch oven? That’s okay! The crockpot will do the trick. Just simply brown short ribs in a skillet and then transfer all ingredients along with short ribs in crockpot and cook on low for 7-8 hours.
If you do not wish to use wine or have it on hand, you can sub out the 2 cups of wine with more beef broth or use cranberry/cherry juice! The flavors will be different but still very tasty.

Citrus Hibiscus Sangria
Having From the Roots just turned 1 yesterday and the website getting a face-lift, I wanted to celebrate with something, fun, fruity, and flavorful. What better way to celebrate than with a drink?
From the Roots has become way more than I have ever imagined. I started out just posting recipes I have created throughout the years and now it has turned into so much more. Within this year, we have been invited to do pop-up events, catered for parties and grand openings for businesses, collaborated with major health product companies, became a brand ambassador for Further Food, Banza, Manitoba Harvest Hemp Foods, and have connected with so many amazing people - YOU!
I couldn’t have done this without YOU, so thank you so much! Well, I could keep rambling, but let’s get to the recipe! I made this into a mock-tail form originally for a Galentine’s Day event. It was such a big hit! But TBH, it would be an even more hit if you added wine or prosecco to it… But you can do whatever you like! ;)
CHEERS TO A HEALTHY, SEASONAL SANGRIA MOCKTAIL. CAN MAKE INTO COCKTAIL VERSION TOO IF THAT’S YOUR THING!
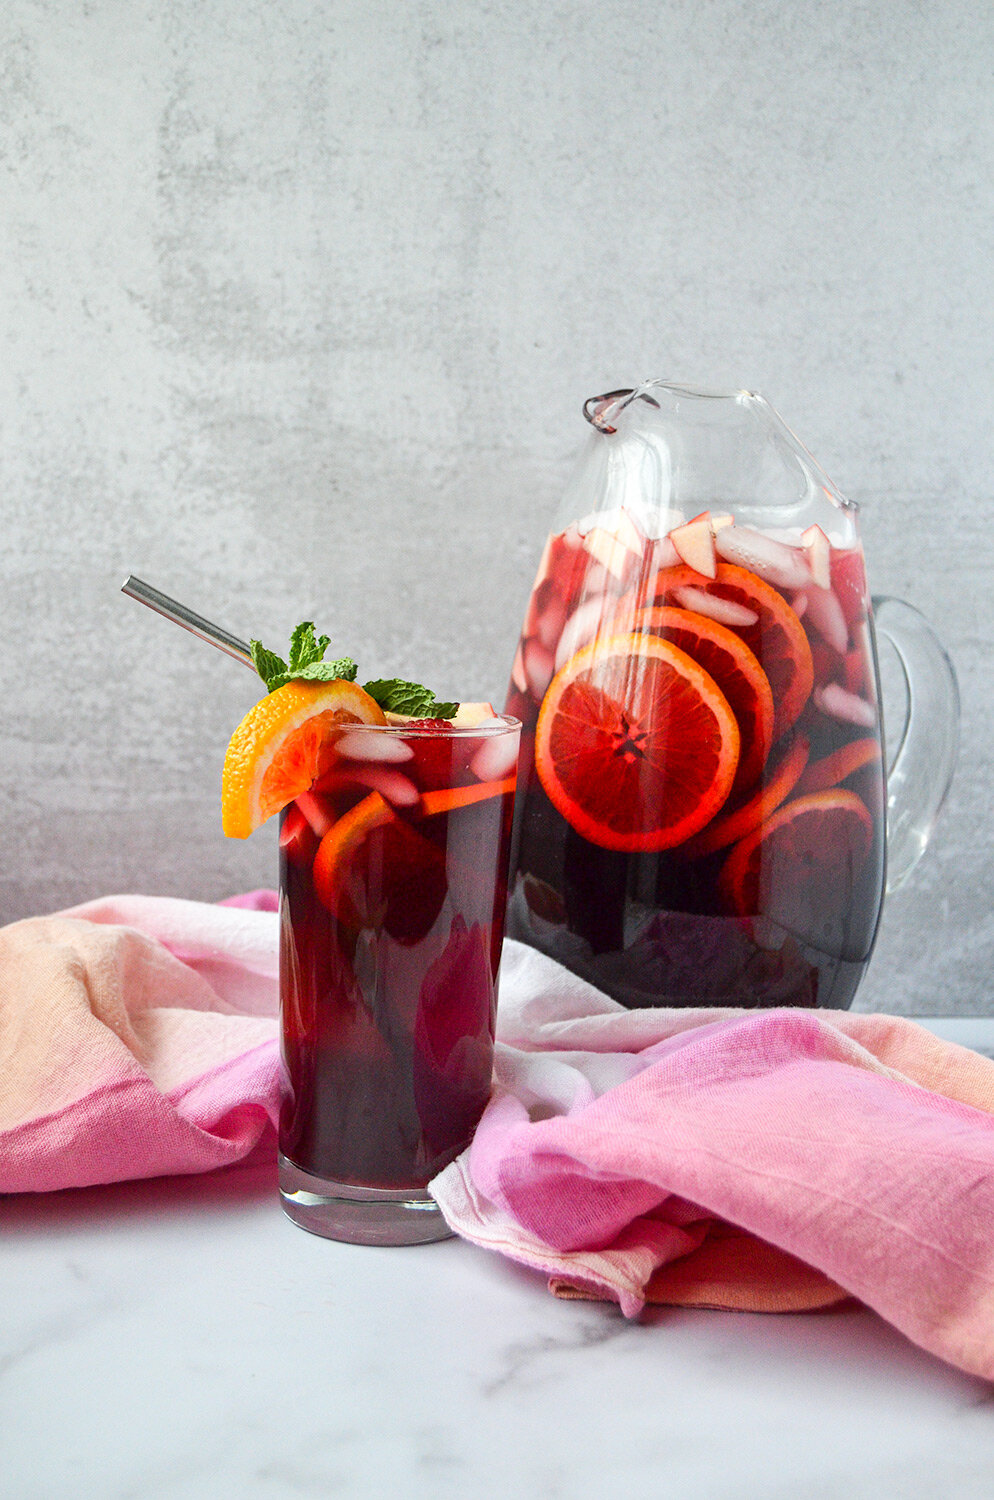
Having From the Roots just turned 1 yesterday and the website getting a face-lift, I wanted to celebrate with something, fun, fruity, and flavorful. What better way to celebrate than with a drink?
From the Roots has become way more than I have ever imagined. I started out just posting recipes I have created throughout the years and now it has turned into so much more. Within this year, we have been invited to do pop-up events, catered for parties and grand openings for businesses, collaborated with major health product companies, became a brand ambassador for Further Food, Banza, Manitoba Harvest Hemp Foods, and have connected with so many amazing people - YOU!

I couldn’t have done this without YOU, so thank you so much! Well, I could keep rambling, but let’s get to the recipe! I made this into a mock-tail form originally for a Galentine’s Day event. It was such a big hit! But TBH, it would be an even more hit if you added wine or prosecco to it… But you can do whatever you like! ;)

When making sangria, it is best to use seasonal produce so that you can the best, full-bodied flavor from the fruits you are using. For this recipe, I cut up blood oranges, apples, and lemons. The tea I used is Stash’s Wild Raspberry Hibiscus so I added fresh raspberries and fresh mint for a refreshing beverage.
You can also make this drink ahead of time by brewing the hibiscus tea with mint the night before to store in the fridge. When you are ready to make the drink, add the hibiscus tea with the juices and mineral water with fresh cut fruits. It’s that easy!

Want more drink recipes? Check out The Holiday Mule, Strawberry Watermelon Mint Agua Fresca, and Watermelon Lime Refresher.
If you try this recipe, let us know! Leave a comment, rate it, and don’t forget to tag a photo to #fromtherootsblog on Instagram. We love seeing what you come up with!
Ingredients:
4 wild raspberry hibiscus tea bags
4 cups filtered water
½ cup organic cane sugar
½ cup fresh mint leaves
1 liter sparkling mineral water
1 qt 100% pure juice (pomegranate, strawberry lemonade, cranberry)
Orange
Lemon
Garnish
Apples, raspberries, fresh mint, blood orange, lemon, lime, grapes, blackberries
Directions:
In a small saucepan, add water and sugar and bring to a boil over medium high heat; stirring until sugar has dissolved.
Remove from heat; add hibiscus tea and fresh mint. Cover and let steep for 15 minutes.
Pour tea mixture through a fine sieve into a bowl or large pitcher and add ice.
Stir in mineral water, juice, and freshly squeezed juice of orange and lemon.
Chill drink in refrigerator until completely cold.
30 minutes before serving, add sliced fruits for presentation and added flavor!
Notes:
I like using Santa Cruz and R.W. Knudsen 100% juice brands. My favorite combo is mixing ½ qt. pomegranate and ½ qt. strawberry raspberry juice.
For tea - I like using Stash’s wild raspberry hibiscus tea.
To make this into a cocktail, replace mineral water with red wine or prosecco.